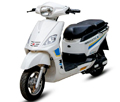
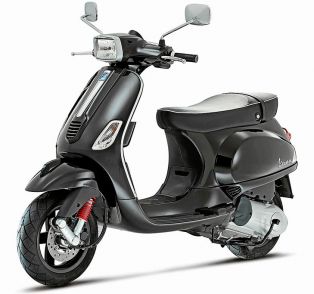
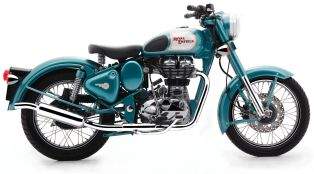
Riding a motorized two wheeler – be it a motorcycle or scooter, has 2 aspects: vehicle control and situational awareness. Once vehicle control is developed, the rider can then proceed to develop situational awareness.
 Universal Motorcycling Rules:
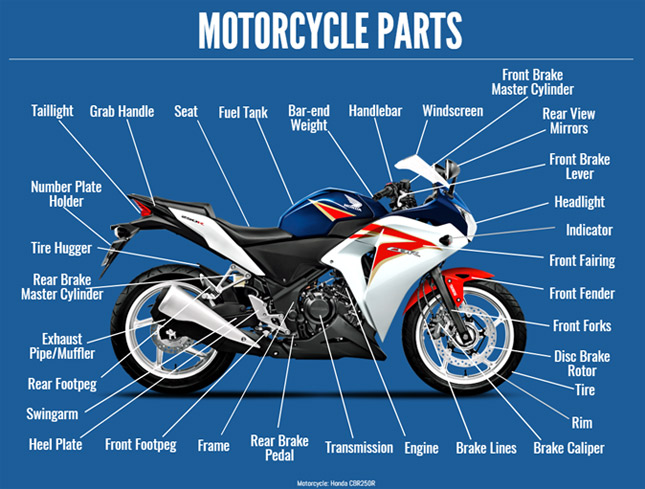
Thirdly, you must know the correct Body Position while riding… The correct body position is very important in motorcycling. Now, onto the practical riding part…
The following aims to develop vehicle control in the rider. With a calm mind, follow these instructions :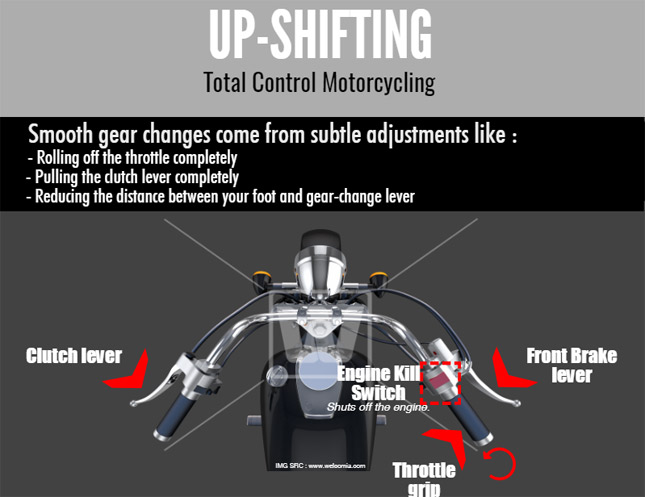 Getting the motorcycle in motion and Up-shifting
1) Start the bike :
a) Ensure that the bike is in Neutral.
b) If it’s not in Neutral, pull in the clutch lever and then start the bike. (Keep it pulled until the gearbox is put into Neutral or the bike is set in motion. Leaving the clutch lever suddenly will stall the bike’s engine)
2) Pull in the clutch lever completely.
3) Select 1st Gear.
4) Now, to get moving:
a) Let out the clutch lever till friction point.
b) Add a little throttle.
c) Now, let out the clutch lever completely to allow for full clutch engagement – full power transfer to the rear wheel, while rolling progressively on the throttle.
5) Get moving and build speed. (roll on the throttle progressively)
6) Now it will be required to shift to 2nd Gear.
7) To up-shift to 2nd Gear:
a) Leave the throttle completely (all the way back).
b) Almost simultaneously pull in the clutch lever completely.
c) Select 2nd Gear.
d) Let out the clutch lever gradually (but not as gradually as at the time of 1st Gear)while adding throttle as needed.
8) Repeat the same process for each up-shift.
NOTE: Gear shifting is a quick process. All this happens quickly. This should be practiced till it becomes habitual.
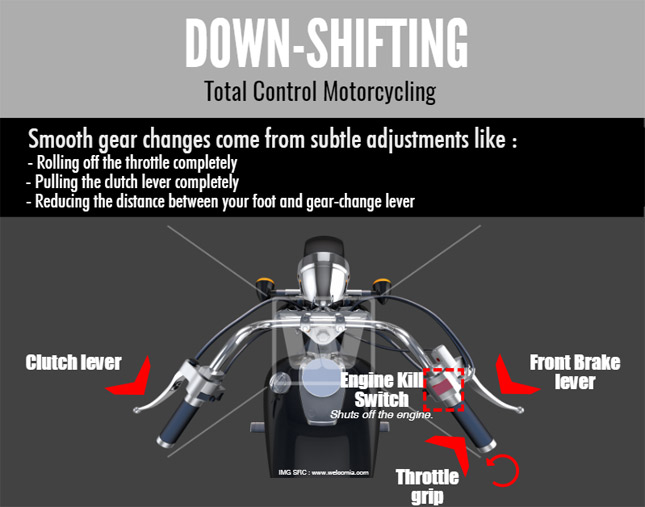 Downshifting
METHOD I:
This method makes use of the brakes to first slow down to a speed suited to the lower gear, then downshifting is done.
1) Leave the throttle completely (all the way back).
2) Pull in the clutch lever completely.
3) Slow down suitably (using both the brakes) to a speed which is appropriate for the lower gear. Bikes are precise machines, each engine RPM and gear combination will lead to an exact speed.
NOTE: 2 (clutch lever pulling) and 3 (slowing down suitably) can be done before/after each other or simultaneously as well. If the speed does NOT drop too low for the required gear such that it needs clutch lever pulling to prevent engine stall, slowing down can be done before pulling in the clutch lever. Else, slowing down can be done after the clutch lever has been pulled in.
4) Then, select the lower gear.
5) Gradually let out the clutch lever, completely.
6) Now add throttle as needed and continue riding in the lower gear.
METHOD II:
This method makes use of the throttle during the down-shifting interval to rev-match the engine and wheel speed, then downshifting is done. The goal of rev-matching is to get the engine running at a speed which will be suitable for the lower gear.
1) Leave the throttle completely (all the way back).
2) Pull in the clutch lever completely.
3) Select the lower gear.
4) Add a quick short blip of the throttle.(Quickly add a little throttle and then leave it completely – all the way back).
5) Soon after, let out the clutch lever quickly. Note that the more there is a delay in letting out the clutch lever, the more the engine RPM/speed will drop during this interval, which is undesirable in this technique.
6) The lower gear has been selected, continue riding in the lower gear by adding throttle as needed.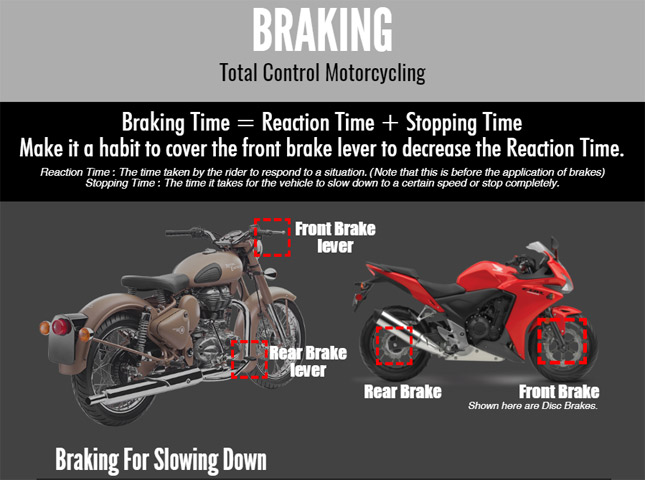 Braking for Slowing Down
1) Leave the throttle completely (all the way back).
2) Apply both the brakes progressively.
3) Slow down to the needed speed:
a) If the speed after slowing down is too slow for the current gear, then downshift to a lower gear.
b) If the speed after slowing down is okay for the current gear, then continue riding in the same gear by adding throttle as needed.
NOTE: Never skip a gear while up-shifting or down-shifting, it is harmful for the transmission/gearbox. When it is time for slowing down, it should be judged whether the speed is correct for the current gear or not.
Braking for Stopping
1) Leave the throttle completely (all the way back).
2) Pull in the clutch lever completely.
3) Apply both the brakes progressively (with increasing pressure).
4) While slowing down, tap down all the gears and select Neutral.
5) Stop and let out the clutch lever.
TIPS:
* In order to have the best traction in every condition the rider must be in the correct gear for the given speed.
* Using both the brakes together reduces the stopping distance to a great extent.
NOTE: This is only an introduction and does not discuss topics like engine braking, panic braking, cornering, etc.
By: Onemoto Motorcycle Coaching
 Universal Motorcycling Rules:
1) Focus, for the entire duration of your commute / journey.
2) Look far ahead.
3) Look where you want to go.
4) Maintain 2 second buffers from the vehicle in front; ensure that you are 2 seconds ahead of the vehicle behind you.
5) Plan Escape Routes.
6) Be smooth.
7) Use hand gestures wherever needed.
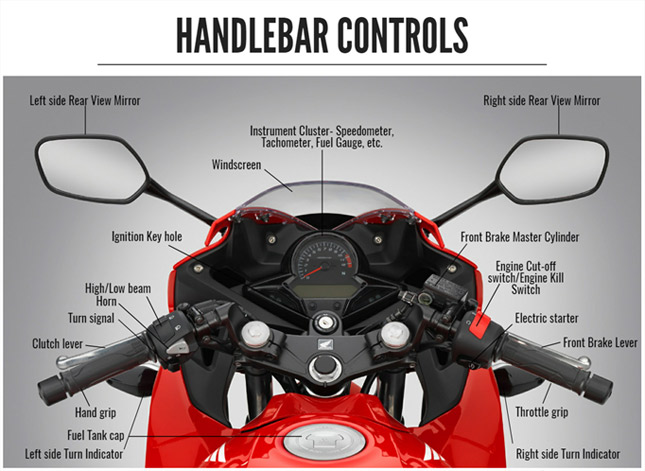
First up, know your motorcycle’s controls (you can also find these in your particular vehicle’s owners manual if you have one).
2) Look far ahead.
3) Look where you want to go.
4) Maintain 2 second buffers from the vehicle in front; ensure that you are 2 seconds ahead of the vehicle behind you.
5) Plan Escape Routes.
6) Be smooth.
7) Use hand gestures wherever needed.

*** You must know your motorcycle’s basic parts
Thirdly, you must know the correct Body Position while riding… The correct body position is very important in motorcycling.
 Now, onto the practical riding part…
The following aims to develop vehicle control in the rider. With a calm mind, follow these instructions :
 Getting the motorcycle in motion and Up-shifting
1) Start the bike :
a) Ensure that the bike is in Neutral.
b) If it’s not in Neutral, pull in the clutch lever and then start the bike. (Keep it pulled until the gearbox is put into Neutral or the bike is set in motion. Leaving the clutch lever suddenly will stall the bike’s engine)
2) Pull in the clutch lever completely.
3) Select 1st Gear.
4) Now, to get moving:
a) Let out the clutch lever till friction point.
b) Add a little throttle.
c) Now, let out the clutch lever completely to allow for full clutch engagement – full power transfer to the rear wheel, while rolling progressively on the throttle.
5) Get moving and build speed. (roll on the throttle progressively)
6) Now it will be required to shift to 2nd Gear.
7) To up-shift to 2nd Gear:
a) Leave the throttle completely (all the way back).
b) Almost simultaneously pull in the clutch lever completely.
c) Select 2nd Gear.
d) Let out the clutch lever gradually (but not as gradually as at the time of 1st Gear)while adding throttle as needed.
8) Repeat the same process for each up-shift.
NOTE: Gear shifting is a quick process. All this happens quickly. This should be practiced till it becomes habitual.
 Downshifting
METHOD I:
This method makes use of the brakes to first slow down to a speed suited to the lower gear, then downshifting is done.
1) Leave the throttle completely (all the way back).
2) Pull in the clutch lever completely.
3) Slow down suitably (using both the brakes) to a speed which is appropriate for the lower gear. Bikes are precise machines, each engine RPM and gear combination will lead to an exact speed.
NOTE: 2 (clutch lever pulling) and 3 (slowing down suitably) can be done before/after each other or simultaneously as well. If the speed does NOT drop too low for the required gear such that it needs clutch lever pulling to prevent engine stall, slowing down can be done before pulling in the clutch lever. Else, slowing down can be done after the clutch lever has been pulled in.
4) Then, select the lower gear.
5) Gradually let out the clutch lever, completely.
6) Now add throttle as needed and continue riding in the lower gear.
METHOD II:
This method makes use of the throttle during the down-shifting interval to rev-match the engine and wheel speed, then downshifting is done. The goal of rev-matching is to get the engine running at a speed which will be suitable for the lower gear.
1) Leave the throttle completely (all the way back).
2) Pull in the clutch lever completely.
3) Select the lower gear.
4) Add a quick short blip of the throttle.(Quickly add a little throttle and then leave it completely – all the way back).
5) Soon after, let out the clutch lever quickly. Note that the more there is a delay in letting out the clutch lever, the more the engine RPM/speed will drop during this interval, which is undesirable in this technique.
6) The lower gear has been selected, continue riding in the lower gear by adding throttle as needed.
 Braking for Slowing Down
1) Leave the throttle completely (all the way back).
2) Apply both the brakes progressively.
3) Slow down to the needed speed:
a) If the speed after slowing down is too slow for the current gear, then downshift to a lower gear.
b) If the speed after slowing down is okay for the current gear, then continue riding in the same gear by adding throttle as needed.
NOTE: Never skip a gear while up-shifting or down-shifting, it is harmful for the transmission/gearbox. When it is time for slowing down, it should be judged whether the speed is correct for the current gear or not.
Braking for Stopping
1) Leave the throttle completely (all the way back).
2) Pull in the clutch lever completely.
3) Apply both the brakes progressively (with increasing pressure).
4) While slowing down, tap down all the gears and select Neutral.
5) Stop and let out the clutch lever.
TIPS:
* In order to have the best traction in every condition the rider must be in the correct gear for the given speed.
* Using both the brakes together reduces the stopping distance to a great extent.
NOTE: This is only an introduction and does not discuss topics like engine braking, panic braking, cornering, etc.
By: Onemoto Motorcycle Coaching


