


 Tubeless tyres have made life a lot easier of many bikers. Gone are the days of the whistling tyres on high speed which start wobbling the minute they get pierced and possibly even tear and burst. This even results in a crash if the bike is going at a high speed and the rider is unable to control the bike. With tubeless tyres, the air escaped very slowly allowing the rider to keep riding on the bike for quite some distance and that too very safely until he/she reaches a place where they can get the tyre fixed.
Now one has to remember that when it comes to tubeless tyres, fixing them is really simple. A 10 year old can also do it, if properly trained. There are no hassles of removing the tyre and the tube and then finding the puncture and removing it. One can simply fix the puncture with the tyre on the bike itself. Also one thing to consider here is that the fixing of a tubeless tyre puncture is really costly if done outside. To put things into retrospect; a tubeless tyre fix in a shop costs over 200/- bucks while buying a puncture fixing kit costs you less than 300-500/- bucks for over 5-10 fixes. Now isn’t that really convenient.
 But to save that cost, even if you have the kit, you have to know how to fix a tubeless tyre. The process is really easy, but one has to understand how it all works. But before that, apart from the usual process to fix a puncture, there are many other options like slime and sealants that you can put in your bike tyres. These sealants are present in the liquid form inside the tyre lining. If there is a puncture and the air starts escaping, this sealant fills the hole and solidifies into a rubber like form effectively sealing the puncture and for you to keep riding without any worries at all.
Now coming to fixing your tubeless tyre, the process is actually very simple. Just one has to follow the steps properly and use the correct tools.
* Locate the puncture on the bike.
* If the nail or puncture causing entity is still present, using a plier, remove it.
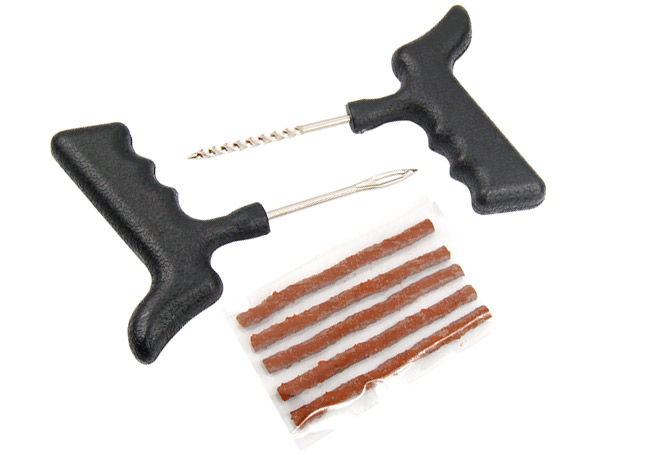
* Now using the smoothening tool, expand the hole and rotate the tool to smoothen out the edges of the puncture.
* Now keeping the smoothening tool semi-inserted in the puncture hole, take a puncture strip and insert it into the eye of the puncture strip insertion tool until it is half on both ends.
* Now remove the smoothening tool from the hole and insert the strip tool with the strip in it and give it a nice push until 1/3rd of the strip is on the outside.
* Now cut off the excess strip and fill the tyre pressure to your desired amount and check for any air leakages from the filled up punctures. If nothing then you are good to go.
And your tyre is fixed. It is a very simple process and hardly takes 10 minutes to be completed. But once done you can ride on with peace of mind and without worrying about punctures anymore. Most importantly you save loads of money by fixing the punctures yourself. So it is a total win-win.* If the nail or puncture causing entity is still present, using a plier, remove it.
* Now using the smoothening tool, expand the hole and rotate the tool to smoothen out the edges of the puncture.
* Now keeping the smoothening tool semi-inserted in the puncture hole, take a puncture strip and insert it into the eye of the puncture strip insertion tool until it is half on both ends.
* Now remove the smoothening tool from the hole and insert the strip tool with the strip in it and give it a nice push until 1/3rd of the strip is on the outside.
* Now cut off the excess strip and fill the tyre pressure to your desired amount and check for any air leakages from the filled up punctures. If nothing then you are good to go.
By: Pratik Patole